
Миниэлектростанция EU20
Руководство по эксплуатации
POWER EQUIPMENT
EU20cover.qxd 25.01.2005 15:14 Page 1
-
Contents
-
Table of Contents
-
Troubleshooting
-
Bookmarks
Quick Links
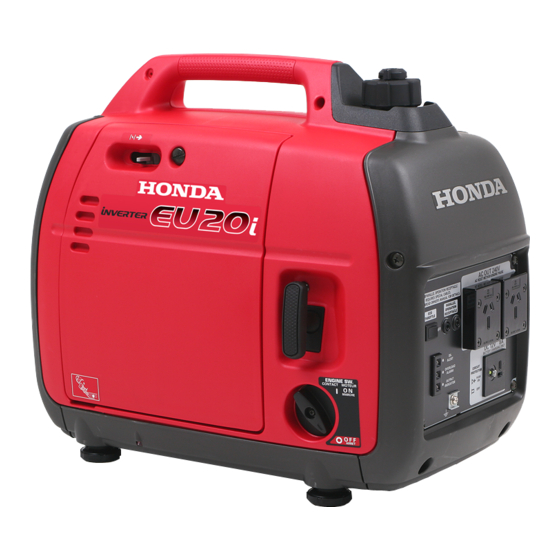
EU20i
OWNER’S MANUAL
MANUEL DE L’UTILISATEUR
BEDIENUNGSANLEITUNG
MANUAL DE EXPLICACIONES
Related Manuals for Honda EU20i
Summary of Contents for Honda EU20i
-
Page 1
GENERATOR EU20i OWNER’S MANUAL MANUEL DE L’UTILISATEUR BEDIENUNGSANLEITUNG MANUAL DE EXPLICACIONES… -
Page 2
Honda EU20i OWNER’S MANUAL Original instructions MANUEL DE L’UTILISATEUR Notice originale BEDIENUNGSANLEITUNG Originalbetriebsanleitung MANUAL DE EXPLICACIONES Manual original The‘‘e-SPEC’’mark symbolizes environmentally responsible technologies applied to Honda power equipment, which contains our wish to ‘‘preserve nature for generations to come.’’… -
Page 3
All information in this publication is based on the latest product information available at the time of approval for printing. Honda Motor Co., Ltd. reserves the right to make changes at any time without notice and without incurring any obligation. -
Page 4: Table Of Contents
. 39 TRANSPORTING/STORAGE …………44 TROUBLESHOOTING …………… 47 SPECIFICATIONS …………….50 WIRING DIAGRAM …………….52 MAJOR Honda DISTRIBUTOR ADDRESSES ….Inside back cover ‘‘ EC Declaration of Conformity ’’ CONTENT OUTLINE ..Inside back cover…
-
Page 5: Safety Instructions
SAFETY INSTRUCTIONS IMPORTANT SAFETY INFORMATION Honda generators are designed for use with electrical equipment that has suitable power requirements. Other uses can result in injury to the operator or damage to the generator and other property. Most injuries or property damage can be prevented if you follow all instructions in this manual and on the generator.
-
Page 6
Carbon Monoxide Hazards Exhaust contains poisonous carbon monoxide, a colorless, odorless gas. Breathing exhaust can cause loss of consciousness and may lead to death. If you run the generator in an area that is confined, or even partially enclosed area, the air you breathe could contain a dangerous amount of exhaust gas. -
Page 7
Fire and Burn Hazards Do not use the generator in areas with a high risk of fire. When installed in ventilated rooms, additional requirements for fire and explosion protection shall be observed. The exhaust system gets hot enough to ignite some materials. Keep the generator at least 1 meter (3 feet) away from buildings and other equipment during operation. -
Page 8
Do not throw it in the trash or pour it on the ground. An improperly disposed battery can hurt the environment. Always confirm local regulations for battery disposal. Contact your Honda servicing dealer for a replacement. -
Page 9: Safety Label Locations
Read the labels and safety notes and precautions described in this manual carefully. If a label comes off or becomes hard to read, contact your Honda dealer for a replacement. [For European model: G, GP3, GW, B, F, W types]…
-
Page 10
Honda generator is designed to give safe and dependable service if operated according to instructions. Read and understand the Owner’s Manual before operating the generator. Failure to do so could result in personal injury or equipment damage. Exhaust contains poisonous carbon monoxide, a colorless, odorless gas. -
Page 11
Gasoline is highly flammable and explosive. Turn the engine off and let it cool before refueling. Connect and remove the receptacle box for parallel operation with the engine stopped. For single operation, the receptacle box for parallel operation must be removed. A hot exhaust system can cause serious burns. -
Page 12
[For Australian model: U type]… -
Page 13: Ce Mark And Noise Label Locations
CE mark and noise label locations [For European model: G, GP3, GW, B, F, W types] NOISE LABEL CE MARK Performance class IP code Dry mass (weight) Sales agency Year of manufacture and address Manufacturer and address…
-
Page 14: Component Identification
COMPONENT IDENTIFICATION FUEL CAP VENT LEVER CHOKE LEVER FUEL FILLER CAP CONTROL PANEL MAINTENANCE COVER STARTER GRIP ENGINE SWITCH SPARK PLUG MAINTENANCE COVER MUFFLER FRAME SERIAL NUMBER Record the frame serial number in the space below. You will need this serial number when ordering parts.
-
Page 15: Control Panel
CONTROL PANEL G, GP3, GW, F, W, and B types AC OUTPUT RECEPTACLES PARALLEL OPERATION SOCKETS ECO THROTTLE SWITCH DC OUTPUT RECEPTACLE OIL ALERT INDICATOR LIGHT OVERLOAD INDICATOR DC CIRCUIT LIGHT PROTECTOR AC CIRCUIT PROTECTORS OUTPUT INDICATOR GROUND TERMINAL LIGHT…
-
Page 16
U type PARALLEL OPERATION SOCKETS AC OUTPUT RECEPTACLES ECO THROTTLE SWITCH OIL ALERT DC OUTPUT INDICATOR RECEPTACLE LIGHT OVERLOAD INDICATOR LIGHT DC CIRCUIT PROTECTOR OUTPUT INDICATOR LIGHT GROUND TERMINAL… -
Page 17
Eco Throttle ECO: Engine speed is kept at idle automatically when the electrical appliance is disconnected and it returns to the proper speed by the electrical load when electrical appliance is connected. This position is recommended to minimize the fuel consumption while in operation. Eco Throttle system does not operate sufficiently if the electrical appliance requires the momentary electric power. -
Page 18: Pre-Operation Check
PRE-OPERATION CHECK Be sure to check the generator on a level surface with the engine stopped. Check the engine oil level. Using non detergent oil or 2-stroke engine oil could shorten the engine’s service life. Recommended oil Use 4-stroke motor oil that meets or exceeds the requirements for API service category SE or later (or equivalent).
-
Page 19
Loosen the maintenance cover screw and remove the maintenance cover. Remove the oil filler cap, and wipe the dipstick with a clean rag. Check the oil level by inserting the dipstick in the oil filler hole without screwing it in. If the oil level is below the end of the dipstick, refill with recommended oil up to the top of the oil filler neck. -
Page 20
Check the fuel level. If the fuel level is low, refuel the fuel tank until the level as specified. After refueling, tighten the fuel filler cap securely. Use automotive unleaded gasoline with a Research Octane Number of 91 or higher (a Pump Octane Number of 86 or higher). Never use stale or contaminated gasoline or an oil/gasoline mixture. -
Page 21
Gasolines Containing Alcohol If you decide to use a gasoline containing alcohol (gasohol), be sure its octane rating is at least as high as that recommended by Honda. There are two types of ‘‘gasohol’’: one containing ethanol, and the other containing methanol. -
Page 22
Check the air cleaner. Check the air cleaner elements to be sure they are clean and in good condition. Loosen the maintenance cover screw and remove the maintenance cover. Press the latch tab on the top of the air cleaner body, remove the air cleaner cover, check the elements. -
Page 23: Starting The Engine
STARTING THE ENGINE Before starting the engine disconnect any load from the AC receptacle. Turn the fuel cap lever fully clockwise to the ON position. Turn the fuel tank cap vent lever to the OFF position when transporting the generator. FUEL CAP VENT LEVER Turn the engine switch to the ON position.
-
Page 24
Move the choke lever to the CLOSED position. Do not use the choke when the engine is warm or the air temperature is high. CHOKE LEVER CLOSED CLOSED Pull the starter grip lightly until you feel resistance, then pull the starter grip briskly toward in the direction of the arrow as shown below. -
Page 25
Move the choke lever to the OPEN position as the engine warms up. CHOKE LEVER OPEN If the engine stops and will not restart, check the engine oil level (see page ) before troubleshooting in other areas. -
Page 26
High altitude performance can be improved by specific modifications to the carburetor. If you always operate your generator at altitudes above 1,500 meters (5,000 feet), have your authorized Honda servicing dealer perform this carburetor modification. This engine, when operated at high altitude with the carburetor modifications for high altitude use, will meet each emission standard throughout its useful life. -
Page 27: Generator Use
GENERATOR USE Be sure to ground the generator when the connected equipment is grounded. Do not connect to a building’s electrical system unless an isolation switch has been installed by a qualified electrician. Connections for standby power to a building’s electrical system must be made by a qualified electrician and must comply with all applicable laws and electrical codes.
-
Page 28
Do not exceed the current limit specified for any one receptacle. Do not connect the generator to a household circuit. This could cause the damage to the generator or to electrical appliances in the house. Do not modify or use the generator for other purposes than it is intended for. -
Page 29
AC applications Start the engine and make sure the Output indicator (green) comes Confirm that the appliance to be used is switched off, and plug in the appliance. OVERLOAD INDICATOR LIGHT (RED) OUTPUT INDICATOR LIGHT (GREEN) Substantial overloading that continuously lights the Overload indicator (red) may damage the generator. -
Page 30
AC Circuit Protector (B, F, G, GP3, GW and W types) The AC circuit protectors will automatically switch OFF (push button comes out) if there is a short circuit or a significant overload of the generator at receptacle. If an AC circuit protector switches OFF automatically, check that the appliance is working properly and does not exceed the rated load capacity of the circuit before resetting the AC circuit protector ON (pushing the push button in). -
Page 31
When an electric motor is started, both the Overload indicator (red) and the Output indicator (green) may come on simultaneously. This is normal if the Overload indicator (red) goes off after about 4 seconds. If the Overload indicator (red) stays on, consult your Honda generator dealer. -
Page 32
Parallel operation Please read the item ‘‘GENERATOR USE’’ before connecting any equipment to be used. Use only a Honda approved receptacle box for parallel operation (optional) when connecting two EU20i generators for parallel operation. Make sure that the electrical rating of the tool or appliance does not exceed that of the generator. -
Page 33
Never connect the different generator models and types. Never connect a cable other than the receptacle box for parallel operation. Connect and remove the receptacle box for parallel operation with the engine stopped. For single operation, the receptacle box for parallel operation must be removed. -
Page 34
Connect the cable connectors and ground terminals of the receptacle box for parallel operation to the generators and secure the cord clamp to handle. Place two generators at least 1 meter (3 feet) away from each other during parallel operation. Route the wire through the handle and clamp it to the handle using the band. -
Page 35
Start the engines and make sure the Output indicators (green) come Confirm that the appliance to be used is switched off, and plug in the appliance. Switch on the equipment to be used. OUTPUT INDICATOR LIGHT (GREEN) AC Circuit Protector (Except U type) The AC circuit protector on the receptacle box for parallel operation will automatically switch OFF (push button comes out) if there is a short circuit or a significant overload of the generator at receptacle. -
Page 36
DC application The DC receptacle may be used for charging 12 volt automotive-type batteries only. In DC operation, turn the Eco Throttle switch to the OFF position. Connect the charging cable to the DC receptacle of the generator and then to the battery terminals. CHARGING CABLE (SOLD SEPARATELY: G, GP3, GW, B, F, W types) To prevent the possibility of creating a spark near the battery,… -
Page 37
Batteries produce explosive gases: If ignited, and explosion can cause serious injury or blindness. Provide adequate ventilation when charging. CHEMICAL HAZARD: Battery electrolyte contains sulfuric acid. Contact with eyes or skin, even through clothing, may cause severe burns. Wear a faceshield and protective clothing. Keep flames and sparks away, and do not smoke in the area. -
Page 38
Oil Alert system The Oil Alert system is designed to prevent engine damage caused by an insufficient amount of oil in the crankcase. Before the oil level in the crankcase falls below a safe limit, the Oil Alert system will automatically shut down the engine (the engine switch will remain in the ON position). -
Page 39: Stopping The Engine
STOPPING THE ENGINE To stop the engine in an emergency, turn the engine switch to the OFF position. IN NORMAL USE: Switch off the connected equipment and pull the inserted plug. PLUG Turn the engine switch to the OFF position. ENGINE SWITCH…
-
Page 40
Turn the fuel cap vent lever fully counterclockwise to the OFF position. FUEL CAP VENT LEVER Be sure the fuel cap vent lever and the engine switch are in the OFF position when stopping, transporting and/or storing the generator. When parallel operation has been executed, pull the receptacle box for parallel operation. -
Page 41: Maintenance
Every 2 years (Replace if necessary) (2) Fuel line Service more frequently when used in dusty areas. These items should be serviced by your Honda servicing dealer, unless you have the proper tools and are mechanically proficient. Refer to the Honda shop manual for service procedures.
-
Page 42
CHANGING OIL Drain the oil while the engine is still warm to assure rapid and complete draining. Make sure to turn the engine switch and the fuel cap vent lever to the OFF position before draining. Loosen the maintenance cover screw and remove the maintenance cover. -
Page 43
AIR CLEANER SERVICE A dirty air cleaner will restrict air flow to the carburetor. To prevent carburetor malfunction, service the air cleaner regularly. Service more frequently when operating the generator in extremely dusty areas. Do not use gasoline or low flash point solvents for cleaning. They are flammable and explosive under certain conditions. -
Page 44
SPARK PLUG SERVICE RECOMMENDED SPARK PLUG: CR5HSB (NGK) To ensure proper engine operation, the spark plug must be properly gapped and free of deposits. Remove the spark plug maintenance cover. SPARK PLUG MAINTENANCE COVER Remove the spark plug cap. Clean any dirt from around the spark plug base. Use a spark plug wrench to remove the spark plug. -
Page 45
Visually inspect the spark plug. Discard it if the insulator is cracked, chipped, or fouled. Clean the spark plug with a wire brush if it is to be reused. Measure the plug gap with a feeler gauge. Correct as necessary by carefully bending the side electrode. The gap should be: 0.6 0.7 mm (0.024 0.028 in) 0.6 0.7 mm… -
Page 46: Transporting/Storage
TRANSPORTING/STORAGE To prevent fuel spillage when transporting or during temporary storage, the generator should be secured upright in its normal operating position, with the engine switch OFF. The fuel cap vent lever is turned fully counterclockwise to the OFF position. Allow the engine to cool well before turning the fuel cap vent lever to the OFF position.
-
Page 47
Before storing the unit for an extended period: Be sure the storage area is free of excessive humidity and dust. Drain the fuel. Gasoline is extremely flammable and is explosive under certain conditions. Perform this task in a well ventilated area with the engine stopped. -
Page 48
Change the engine oil. Remove the spark plug and pour about a tablespoon of clean engine oil into the cylinder. Crank the engine several revolutions to distribute the oil, then reinstall the spark plug. Slowly pull the starter grip until resistance is felt. At this point, the piston is coming up on its compression stroke and both the intake and exhaust valves are closed. -
Page 49: Troubleshooting
Add the in the engine? recommended oil. Is the spark plug Clean, readjust in good gap and dry the condition? spark plug. Replace it if necessary. If the engine still does not start, take the generator to an authorized Honda dealer.
-
Page 50
Is the AC circuit circuit protector protector ON? Is the output indicator on? Take the Is the Overload generator to an indicator on? authorized Honda dealer. Check the Take the electrical NO DEFECTS generator to an appliance or authorized equipment for Honda dealer. -
Page 51
No electricity at the DC receptacle: Is the DC circuit Turn the DC protector ON? circuit protector Take the generator to an authorized Honda dealer. -
Page 52: Specifications
SPECIFICATIONS Dimensions and Weight Model EU20i Description code EAAJ Length 512 mm (20.2 in) Width 290 mm (11.4 in) Height 425 mm (16.7 in) Dry weight 20.8 kg (45.9 lbs) Engine Model GX100 Engine type 4-stroke, overhead camshaft, single cylinder Displacement 98.5 cm (6.01 cu-in)
-
Page 53
Noise EU20i Model G, GP3, GW, B, F, W Type Not exceed Sound pressure level at 70 dB (A) the workstation (2006/42/EC) Microphone point CONTROL PANEL Center 1.60 m 1.0 m Uncertainty 88 dB (A) Measured sound power level (2000/14/EC, 2005/88/EC) -
Page 54: Wiring Diagram
WIRING DIAGRAM INDEX (See inside back cover) B, W, F, G Types …………….. . W 1 U Type ………………..W 2 ABBREVIATIONS Symbol Part name Symbol Part name AC, CP AC Circuit Protector StpM Stepping Motor AC, NF AC Noise Filter (Throttle Control) ACOR AC Output Receptacle…
-
Page 55
RECEPTACLE Shape Type G, GP3, GW… -
Page 57
WIRING DIAGRAM SCHÉMA DE CABLAGE SCHALTPLAN DIAGRAMA DE CONEXIONES… -
Page 61: Major Honda Distributor Addresses
Weitere Informationen erhalten Sie gerne vom Honda- Kundeninformationszentrum unter der folgenden Adresse oder Telefonnummer: DIRECCIONES DE LOS PRINCIPLES CONCESIONARIOS Honda Para obtener más información, póngase en contacto con el Centro de información para clientes Honda en la dirección o número de teléfono siguientes:…
-
Page 62
AUSTRIA CROATIA FINLAND Honda Motor Europe (North) Hongoldonia d.o.o. OY Brandt AB. Hondastraße 1 Jelkovecka Cesta 5 Tuupakantie 7B 2351 Wiener Neudorf 10360 Sesvete Zagreb 01740 Vantaa Tel. : 43 (0)2236 690 0 Tel. : 385 1 2002053 Tel. :… -
Page 63
356 21 480 150 http://www.honda.pt info hondakisgepek.hu honda.produtos honda-eu. ICELAND NETHERLANDS REPUBLIC OF BELARUS Bernhard ehf. Honda Motor Europe (North) Vatnagardar 24-26 Afd. Power Equipment- Scanlink Ltd. 104 Reykdjavik Capronilaan 1 Kozlova Drive, 9 Tel. : 354 520 1100 1119 NN Schiphol-Rijk… -
Page 64
CR honda.ua ventas aucasa.com taller aucasa.com SLOVAKIA REPUBLIC SWEDEN UNITED KINGDOM Honda Slovakia, spol. s r.o. Honda Nordic AB Honda (UK) Power Equipment Prievozská 6 821 09 Bratislava Box 50583 — Västkustvägen 17 470 London Road Tel. : 421 2 32131112 20215 Malmö… -
Page 65
«EC Declaration of Conformity» CONTENT OUTLINE «CE-Déclaration de conformité» DESCRIPTION DE TABLE DES MATIERES «EU-Konformitätserklärung» INHALTSÜBERSICHT DESCRIPCIÓN GENERAL DEL CONTENIDO DE LA «Declaración de Conformidad CE» *1: see specification page. *1: Siehe Spezifikationen-Seite é á *1: voir page de sp cifications *1: consulte la p gina de las… -
Page 69
oHonda Motor Co., Ltd. 2009 efgsY16000.2009.08 36Z07610 Printed in Japan 00X36-Z07-6100…
Сейчас в базе инструкций для HONDA EU20I насчитывается 3 бесплатных инструкций.


HONDA EU20I (49 стр., ru)
Оглавление инструкции
- Страница 1 из 50
EU20.qxd 10.02.2005 14:00 Page 1 Благодарим за то, что вы приобрели миниэлектростанцию компании Honda. В данном руководстве содержатся сведения о правильной эксплуатации и уходе за миниэлектростанцией модели EU20i. Все сведения в данном «Руководстве» соответствуют состоянию выпускаемой продукции на - Страница 2 из 50
EU20.qxd 10.02.2005 14:00 Page 2 СОДЕРЖАНИЕ 1. МЕРЫ БЕЗОПАСНОСТИ . . . . . . . . . . . . . . . . . . . . . . . . . . . . . . . . . . . . . . . . . . . . . . . . .3 2. МЕСТА РАСПОЛОЖЕНИЯ ПРЕДУПРЕЖДАЮЩИХ НАКЛЕЕК . . . . . . . . . . . . . . . . . . . .6 CE маркировка и места расположения наклеек с - Страница 3 из 50
EU20.qxd 10.02.2005 14:00 Page 3 1. МЕРЫ БЕЗОПАСНОСТИ ПРЕДУПРЕЖДЕНИЕ Для обеспечения безопасной работы • Конструкция миниэлектростанции Honda обеспечивает безопасность и надежность эксплуатации при условии соблюдения всех инструкций изготовителя. Внимательно прочтите и изучите данное «Руководство» - Страница 4 из 50
EU20.qxd 10.02.2005 14:00 Page 4 ПРЕДУПРЕЖДЕНИЕ Для обеспечения безопасной работы • Бензин является легковоспламеняющимся веществом и при определенных условиях взрывоопасен. Заправку топливного бака следует производить при неработающем двигателе на открытом воздухе или в хорошо проветриваемых - Страница 5 из 50
EU20.qxd 10.02.2005 14:00 Page 5 ПРЕДУПРЕЖДЕНИЕ Для обеспечения безопасной работы • Перед запуском двигателя обязательно проводите контрольный осмотр мини электростанции в соответствии с процедурой, указанной на стр. 13. Выполнение это го условия может позволить Вам избежать несчастного случая или - Страница 6 из 50
EU20.qxd 10.02.2005 14:01 Page 6 2. МЕСТА РАСПОЛОЖЕНИЯ ПРЕДУПРЕЖДАЮЩИХ НАКЛЕЕК Эти наклейки предупреждают вас о потенциальной опасности серьезного травмирова ния. Внимательно прочтите текст на наклейках, а также замечания и предупреждения, которые приведены в данном «Руководстве». Если - Страница 7 из 50
EU20.qxd 10.02.2005 14:01 Page 7 (Для моделей, поставляемых в Автралию. Версия U) 7 - Страница 8 из 50
EU20.qxd 10.02.2005 14:01 Page 8 • CE маркировка и места расположения наклеек с указанием уровня шумности (для моделей, поставляемых на Европейский рынок. Версии G, B, F, W) НАКЛЕЙКА С УКАЗАНИЕМ УРОВНЯ ШУМНОСТИ • СЕ МАРКИРОВКА Наименование изготовителя и адрес Максимально допустимая для - Страница 9 из 50
EU20.qxd 10.02.2005 14:01 Page 9 3. ОСНОВНЫЕ УЗЛЫ И ДЕТАЛИ ПЕРЕКЛЮЧАТЕЛЬ ВОЗДУШНОЙ ЗАСЛОНКИ ВЕНТИЛЯЦИОННЫЙ КОЛПАЧОК КРЫШКИ ТОПЛИВОЗАЛИВНОЙ ГОРЛОВИНЫ КРЫШКА ТОПЛИВОЗАЛИВНОЙ ГОРЛОВИНЫ БОКОВАЯ КРЫШКА РУЧКА СТАРТЕРА ПАНЕЛЬ УПРАВЛЕНИЯ ВЫКЛЮЧАТЕЛЬ ЗАЖИГАНИЯ КРЫШКА ГЛУШИТЕЛЬ ЗАВОДСКОЙ НОМЕР РАМЫ Впишите - Страница 10 из 50
EU20.qxd 10.02.2005 14:01 Page 10 ПАНЕЛЬ УПРАВЛЕНИЯ Версии G, F, W РОЗЕТКИ ДЛЯ ПАРАЛЛЕЛЬНОГО ПОДКЛЮЧЕНИЯ ВЫКЛЮЧАТЕЛЬ ДРОССЕЛЬНОЙ ЗАСЛОНКИ СИСТЕМЫ ЕСО РОЗЕТКИ ПЕРЕМЕННОГО ТОКА РОЗЕТКА ПОСТОЯННОГО ТОКА ПРЕДОХРАНИТЕЛЬ ЦЕПИ ПОСТОЯННОГО ТОКА КЛЕММА ЗАЗЕМЛЕНИЯ СИГНАЛИЗАТОР НИЗКОГО ДАВЛЕНИЯ МОТОРНОГО - Страница 11 из 50
EU20.qxd 10.02.2005 14:01 Page 11 Версия В РОЗЕТКИ ПЕРЕМЕННОГО ТОКА РОЗЕТКИ ПЕРЕМЕННОГО ТОКА Версия U 11 - Страница 12 из 50
EU20.qxd 10.02.2005 14:01 Page 12 Дроссельная заслонка системы ЕСО Система ЕСО: При работе без нагрузки система автоматически переводит двигатель в режим холостого хода. После подключения потребителя тока двигатель автоматически набирает обороты, необходимые для достижения соответствующей выходной - Страница 13 из 50
EU20.qxd 10.02.2005 14:01 Page 13 4. КОНТРОЛЬНЫЙ ОСМОТР ВНИМАНИЕ: Контрольный осмотр миниэлектростанции проводится на горизонтальной поверхности при заглушенном двигателе. 1. Проверка уровня моторного масла в двигателе. ВНИМАНИЕ: Использование моторного масла, не обладающего моющими свойствами или - Страница 14 из 50
EU20.qxd 10.02.2005 14:01 Page 14 2. Проверка уровня топлива. Рекомендуется использовать неэтилированный либо малоэтилированный автомо бильный бензин для уменьшения отложений в камере сгорания. При низком уровне топлива долейте его до установленного уровня. Запрещается эксплуатировать двигатель на - Страница 15 из 50
EU20.qxd 10.02.2005 14:01 Page 15 Использование спиртосодержащих видов топлива Если вы решили эксплуатировать двигатель на бензине, содержащем спирт, убе дитесь в том, что октановое число этого топлива не ниже значения, рекомендованного компанией Honda. Существует два вида спиртосодержащего - Страница 16 из 50
EU20.qxd 10.02.2005 14:01 Page 16 5. ПУСК ДВИГАТЕЛЯ Перед запуском двигателя необходимо отсоединить все потребители тока от розеток переменного тока. 1. Переведите вентиляционный колпачок крышки топливозаливной горловины по часовой стрелке в положение «ON» (ВКЛ). ПРИМЕЧАНИЕ: При транспортировке - Страница 17 из 50
EU20.qxd 10.02.2005 14:01 Page 17 3. Переведите переключатель воздушной заслонки в положение «CLOSED» (ЗАКРЫТО). ПРИМЕЧАНИЕ: • При высокой температуре окружающего воздуха или теплом двигателе не нужно закрывать воздушную заслонку. ЗАКРЫТО ПЕРЕКЛЮЧАТЕЛЬ ВОЗДУШНОЙ ЗАСЛОНКИ ЗАКРЫТО 4. Слегка потяните - Страница 18 из 50
EU20.qxd 10.02.2005 14:01 Page 18 5. При прогреве двигателя переведите перключатель воздушной заслонки в положение «OPEN» (ОТКРЫТО). ПЕРЕКЛЮЧАТЕЛЬ ВОЗДУШНОЙ ЗАСЛОНКИ ОТКРЫТО ОТКРЫТО ПРИМЕЧАНИЕ: Если двигатель заглох и не запускается, поиск причины неисправности начинайте с проверки уровня моторного - Страница 19 из 50
EU20.qxd 10.02.2005 14:01 Page 19 • Эксплуатация в условиях высокогорья На большой высоте над уровнем моря топливовоздушная смесь, поступающая в двигатель, будет переобогащенной. Мощность двигателя снизится, а расход топлива возрастет. Двигатель можно адаптировать к работе на большой высоте над - Страница 20 из 50
EU20.qxd 10.02.2005 14:01 Page 20 6. ЭКСПЛУАТАЦИЯ Обязательно заземляйте миниэлектростанцию, если подсоединенные к ней потреби тели тока заземлены. ПРЕДУПРЕЖДЕНИЕ Монтаж электрической проводки для подвода резервной мощности должен осу ществляться силами квалифицированного электрика. Схема - Страница 21 из 50
EU20.qxd 10.02.2005 14:01 Page 21 ПРИМЕЧАНИЕ: • Розетка постоянного тока может использоваться одновременно с розетками переменного тока. При одновременном использовании розеток постоянного и переменного тока следите, чтобы размер совокупной нагрузки не превышал установленной величины (см. стр. 43). - Страница 22 из 50
EU20.qxd 10.02.2005 14:01 Page 22 Потребители переменного тока 1. Запустите двигатель и убедитесь, что включился сигнализатор выходной нагрузки (зеленого цвета). 2. Убедитесь, что подключаемый потребитель тока выключен, затем подключите его к генератору миниэлектростанции. ШТЕПСЕЛЬНАЯ ВИЛКА - Страница 23 из 50
EU20.qxd 10.02.2005 14:02 Page 23 Сигнализаторы выходной нагрузки и перегрузки В штатных режимах работы сигнализатор выходной нагрузки зеленого цвета будет всегда включен. В случае возникновения перегрузки миниэлектростанции (более 1,6 кВ*А) или короткого замыкания в подсоединенном потребителе - Страница 24 из 50
EU20.qxd 10.02.2005 14:02 Page 24 Параллельное подключение миниэлектростанции Перед подключением любого оборудования внимательно прочитайте раздел «ЭКСПЛУАТАЦИЯ МИНИЭЛЕКТРОСТАНЦИИ». При параллельной работе двух миниэлектростанций модели EU20i максимальная мощность может составить 3,2 кВ*А. Для - Страница 25 из 50
EU20.qxd 10.02.2005 14:02 Page 25 ПРЕДУПРЕЖДЕНИЕ • При параллельном подключении запрещено использовать миниэлектростанции различающихся моделей и версий. • Для параллельного подключения миниэлектростанции используйте исключительно специальный кабель с розеткой. • Подключение и отсоединение - Страница 26 из 50
EU20.qxd 10.02.2005 14:02 Page 26 2. Обязательно заземляйте миниэлектростанцию, если подсоединенные к нему потребители тока заземлены. КЛЕММА ЗАЗЕМЛЕНИЯ 3. Запустите каждый двигатель согласно процедуре, указанной в разделе «ПУСК ДВИГАТЕЛЯ». • Если после запуска двигателя вместо сигнализатора - Страница 27 из 50
EU20.qxd 10.02.2005 14:02 Page 27 5. Включите потребитель тока. Должен загореться сигнализатор выходной нагрузки зеленого цвета. При нормальной работе СИГНАЛИЗАТОР ВЫХОДНОЙ НАГРУЗКИ (ЗЕЛЕНОГО ЦВЕТА) При перегрузке или коротком замыкании СИГНАЛИЗАТОР ПЕРЕГРУЗКИ (КРАСНОГО ЦВЕТА) • В случае перегрузки - Страница 28 из 50
EU20.qxd 10.02.2005 14:02 Page 28 ПРИМЕЧАНИЕ: • Иногда потребитель тока (например, электродвигатель) нуждается в больших пусковых токах. При этом сигнализатор перегрузки красного цвета и сигнализатор выходной нагрузки зеленого цвета будут одновременно гореть в течение около 4 секунд. Такое - Страница 29 из 50
EU20.qxd 10.02.2005 14:02 Page 29 Применение цепи постоянного тока Розетка постоянного тока может использоваться только для зарядки автомобильных 12 вольтовых аккумуляторных батарей. ПРИМЕЧАНИЕ: • При работе в режиме подачи постоянного тока выключатель дроссельной заслонки системы ЕCO должен быть - Страница 30 из 50
EU20.qxd 10.02.2005 14:02 Page 30 ПРЕДУПРЕЖДЕНИЕ • Аккумуляторная батарея выделяет взрывоопасные газы; запрещается подносить к ней искрящие предметы, открытое пламя и сигареты. Необходимо обеспечивать эф фективную вентиляцию помещения, в котором производится зарядка аккумулятор ных батарей. • В - Страница 31 из 50
EU20.qxd 10.02.2005 14:02 Page 31 Система предупреждения о низком давлении моторного масла в двигателе Система предназначена предотвращать повреждение двигателя вследствие недоста точного количества моторного масла в картере двигателя. Прежде чем уровень мотор ного масла в двигателе упадет ниже - Страница 32 из 50
EU20.qxd 10.02.2005 14:02 Page 32 7. ОСТАНОВКА ДВИГАТЕЛЯ Для экстренной остановки двигателя необходимо перевести выключатель зажигания в положение «OFF» (ВЫКЛ). ВЫКЛЮЧЕНИЕ ДВИГАТЕЛЯ В ШТАТНОМ РЕЖИМЕ: 1. Выключите потребитель тока и выньте из розетки миниэлектростанции штепсельную вилку потребителя. - Страница 33 из 50
EU20.qxd 10.02.2005 14:02 Page 33 3. Поверните вентиляционный колпачок крышки топливозаливной горловины на пол ный оборот против часовой стрелки в положение «OFF» (ВЫКЛ). ВЫКЛ ВЕНТИЛЯЦИОННЫЙ КОЛПАЧОК КРЫШКИ ТОПЛИВОЗАЛИВНОЙ ГОРЛОВИНЫ ВЫКЛ ВНИМАНИЕ: При остановке, транспортировке и хранении двигателя - Страница 34 из 50
EU20.qxd 10.02.2005 14:02 Page 34 8. ТЕХНИЧЕСКОЕ ОБСЛУЖИВАНИЕ Периодическое техническое обслуживание и настройка миниэлектростанции призваны сохранить ее в наилучшем техническом состоянии. Проводите технические осмотры и техническое обслуживание с соблюдением интервалов, указанных в таблице ниже. - Страница 35 из 50
EU20.qxd 10.02.2005 14:02 Page 35 1. ЗАМЕНА МАСЛА Слейте моторное масло, пока двигатель не остыл (это обеспечит быстрый и полный слив масла). ВНИМАНИЕ: Перед сливом масла необходимо установить выключатель зажигания и вентиляционный колпачок крышки топливозаливной горловины в положение «OFF» (ВЫКЛ). - Страница 36 из 50
EU20.qxd 10.02.2005 14:02 Page 36 2. ОБСЛУЖИВАНИЕ ВОЗДУШНОГО ФИЛЬТРА При сильно загрязненном воздушном фильтре количество подаваемого в карбюратор воздуха уменьшается. Соблюдайте регламент технического обслуживания воздушного фильтра для недопущения сбоев в работе карбюратора. При эксплуатации - Страница 37 из 50
EU20.qxd 10.02.2005 14:02 Page 37 3. ОБСЛУЖИВАНИЕ СВЕЧИ ЗАЖИГАНИЯ РЕКОМЕНДОВАННЫЕ МОДЕЛИ СВЕЧЕЙ ЗАЖИГАНИЯ: CR5HSB (NGK) Для обеспечения нормальной работы двигателя свечи зажигания должны быть свободны от отложений, между электродами свечи должен быть установлен правильный зазор. 1. Снимите крышку, - Страница 38 из 50
EU20.qxd 10.02.2005 14:02 Page 38 5. Осмотрите свечу зажигания. Свеча зажигания с наличием трещин либо сколов изоляции подлежит замене. Если свеча зажигания будет снова установлена в двигатель, очистите ее с помощью проволочной щетки. 6. Измерьте с помощью плоского щупа зазор между электродами - Страница 39 из 50
EU20.qxd 10.02.2005 14:02 Page 39 9. ТРАНСПОРТИРОВКА/ХРАНЕНИЕ Чтобы исключить возможность утечки топлива, при транспортировке либо хранении миниэлектростанции должна находиться в рабочем вертикальном положении, выключатель зажигания должен быть установлен в положение «OFF» (ВЫКЛ). Венти ляционный - Страница 40 из 50
EU20.qxd 10.02.2005 14:02 Page 40 3. Замените моторное масло в двигателе. 4. Выкрутите свечу зажигания и влейте столовую ложку чистого моторного масла в цилиндр двигателя. Проверните двигатель на несколько оборотов, чтобы масло равномерно распределилось, затем вкрутите свечу зажигания. 5. Медленно - Страница 41 из 50
EU20.qxd 10.02.2005 14:02 Page 41 10. ВОЗМОЖНЫЕ НЕИСПРАВНОСТИ И СПОСОБЫ ИХ УСТРАНЕНИЯ Если двигатель не запускается: Проверьте, имеется ли топливо в топливном баке. ДА Проверьте, установлен ли выключатель зажигания в положение «ON» (ВКЛ). ДА Имеется ли в двигателе моторное масло? ДА Проверьте, - Страница 42 из 50
EU20.qxd 10.02.2005 14:02 Page 42 Если подключенный потребитель тока не работает: Проверьте, горит ли сигнализатор выходной нагрузки зеленого цвета. НЕТ ДА Горит ли сигнализатор перегрузки? НЕТ ДА Проверьте потребитель тока на наличие неисправностей. НЕТ НЕИСПРАВНОСТЕЙ ЕСТЬ НЕИСПРАВНОСТИ Обратитесь - Страница 43 из 50
EU20.qxd 10.02.2005 14:02 Page 43 11. ТЕХНИЧЕСКИЕ ХАРАКТЕРИСТИКИ Габаритные размеры и масса Модель Код обозначения Длина x Ширина x Высота Сухая масса EU20i EAAJ 510 x 290 x 425 мм 21 кг Двигатель Модель Тип двигателя Рабочий объем (диаметр цилиндра х ход поршня) Степень сжатия Количество оборотов - Страница 44 из 50
EU20.qxd 10.02.2005 14:02 Page 44 12. КОММУТАЦИОННАЯ СХЕМА AC, NF ACOR Cot CPB DC, D DC, NF DCOR DC, W EcoSw EgB EgG ESw ExW FrB FrG GeB GT IgC IU MW OAL Ol OLSw PC PL SP SpU StpM SW 44 Подавитель помех цепи переменного тока Розетка переменного тока Совмещенная розетка Блок панели управления Диод - Страница 45 из 50
EU20.qxd Bl Y Bu G R W Br Lg Gr Lb O P 10.02.2005 14:02 Page 45 ЧЕРНЫЙ ЖЕЛТЫЙ СИНИЙ ЗЕЛЕНЫЙ КРАСНЫЙ БЕЛЫЙ КОРИЧНЕВЫЙ СВЕТЛО ЗЕЛЕНЫЙ СЕРЫЙ ГОЛУБОЙ ОРАНЖЕВЫЙ РОЗОВЫЙ 45 - Страница 46 из 50
EU20.qxd 10.02.2005 Версии G, B, F, W 46 14:02 Page 46 - Страница 47 из 50
EU20.qxd 10.02.2005 14:02 Page 47 Версия U 47 - Страница 48 из 50
EU20.qxd 10.02.2005 14:03 Page 48 РОЗЕТКА Вид 48 Тип - Страница 49 из 50
EU20.qxd 10.02.2005 14:03 Page 49 12. АДРЕСА ДИЛЕРОВ КОМПАНИИ HONDA Дилер Адрес фактический ЗАО «Аояма Моторс» Россия, г. Москва, ул. Домостроительная, д.4 ЗАО «Аояма Моторс» Россия, г. Москва, Волгоградский пр т, д.18 ООО «Сева Норд» 105203, Россия, г. Москва, 16 ая Парковая ул., д. 2, корп. 1, - Страница 50 из 50
-
Contents
-
Table of Contents
-
Troubleshooting
-
Bookmarks
Quick Links
Генераторы HONDA EU20I — инструкция пользователя по применению, эксплуатации и установке на русском языке. Мы надеемся, она поможет вам решить возникшие у вас вопросы при эксплуатации техники.
Вы можете скачать инструкцию к HONDA EU20I по ссылке ниже, если не хотите ждать загрузки. Если остались вопросы, задайте их в комментариях после инструкции.
«Загружаем инструкцию», означает, что нужно подождать пока файл загрузится и можно будет его читать онлайн. Некоторые инструкции очень большие и время их появления зависит от вашей скорости интернета.
Полезные видео
Характеристики
Остались вопросы?
Не нашли свой ответ в руководстве или возникли другие проблемы? Задайте свой вопрос в форме ниже с подробным описанием вашей ситуации, чтобы другие люди и специалисты смогли дать на него ответ. Если вы знаете как решить проблему другого человека, пожалуйста, подскажите ему


Часто задаваемые вопросы

Как посмотреть инструкцию к HONDA EU20I?
Необходимо подождать полной загрузки инструкции в сером окне на данной странице или скачать кликнув по специальной кнопке.
Руководство на русском языке?
Все наши руководства представлены на русском языке или схематично, поэтому вы без труда сможете разобраться с вашей моделью
Как можно распечатать инструкцию?
Скачайте ее по специальной кнопке над формой чтения на ваше устройства и отправьте на печать.