- Manuals
- Brands
- ADA INSTRUMENTS Manuals
- Security Sensors
- Wall Scanner 120 Prof
Manuals and User Guides for ADA INSTRUMENTS Wall Scanner 120 Prof. We have 1 ADA INSTRUMENTS Wall Scanner 120 Prof manual available for free PDF download: Operating Manual
-
Contents
-
Table of Contents
-
Bookmarks
Available languages
-
EN
-
RU
Quick Links
INSTRUMENTS
Operating manual
Wire, metal and wood detector
Model: Wall Scanner 120 Prof
Manufacturer: ADAINSTRUMENTS
Address: WWW.ADAINSTRUMENTS.COM
Related Manuals for ADA INSTRUMENTS Wall Scanner 120 Prof
Summary of Contents for ADA INSTRUMENTS Wall Scanner 120 Prof
-
Page 1
INSTRUMENTS Operating manual Wire, metal and wood detector Model: Wall Scanner 120 Prof Manufacturer: ADAINSTRUMENTS Address: WWW.ADAINSTRUMENTS.COM… -
Page 2: Table Of Contents
WallScanner 120 Prof INSTRUMENTS Table of contents 1. Intended Use ……….3 2.
-
Page 3: Intended Use
WallScanner 120 Prof INSTRUMENTS Intended Use The measuring tool is intended for the detec- tion of metals (ferrous and non-ferrous metals, e.g., rebar), joists and ‘live’ wires/conductors in walls, ceilings and floors. Product Features 1. Illuminated ring 2. Marking line 3.
-
Page 4
WallScanner 120 Prof INSTRUMENTS 11. Contact pads 12. Sensor area 13. Type plate 14. Battery compartment lid 15. Hole for hand strip DISPLAY ELEMENTS a) Switch Off audio signal b) Warning function c) Non-metal object d) Non-magnetic metal e) Magnetic metal f) Charged wire g) Temperature control h) Battery indication… -
Page 5: Technical Data
WallScanner 120 Prof INSTRUMENTS Technical data Maximum scanning depth*: Ferrous metals 120 mm Non-ferrous metals (Copper) 80 mm Copper conductors (live)** 50 mm Wood 38 mm Automatic switch off after approx. 5 min Operating temperature -10 °C…+50°C Storage temperature -20°C…+70°C Battery 1×9 V Operating lifetime approx.
-
Page 6: Operation
WallScanner 120 Prof INSTRUMENTS Operation INSERTING/REPLACING THE BATTERY Use only 9Vbattery. Insert the battery into the battery compartment (13) in accordance with the symbols in the battery com- partment. Remove the batteries if the unit will not be used for a long period. The battery can be corroded or discharged over long periods.
-
Page 7
WallScanner 120 Prof INSTRUMENTS When the tool is on the surface of the object, the illuminated ring lights up green. Measuring indicator i indicates maximum amplitude above the center of the object. Illuminated ring (1) lights up red and audio signal sounds. -
Page 8: Detection Of Objects
WallScanner 120 Prof INSTRUMENTS DETECTION OF OBJECTS The detection of metal objects Press button 9 to detect metal objects. Illuminated ring (1) and indication above the button (4) light up green. Symbol (the metal detection indicator) or is indicated on the display. Note: Scale “i”…
-
Page 9: Operating Instructions
WallScanner 120 Prof INSTRUMENTS In rear cases the detector can’t detect examined object, because the sensor area and type plate are solid and dirty. Just clean the measuring tool with dry and soft cloth and restart the measuring procedure. Scanning for “live” wires This mode is suitable for detecting “live”…
-
Page 10: Maintenance And Service
WallScanner 120 Prof INSTRUMENTS moisture, metallic building materials. Foil-laminated insulation materials or conductive wallpaper. Therefore, please also observe other information sources (e.g. construction plans) before drilling, sawing or routing into walls, ceilings or floors. Maintenance and service Wipe away debris or contamination with a dry, soft cloth. Do not use cleaning agents or solvents. In order not to affect the measuring function, decals/stickers or name plates, especially metal ones, may not be attached in the sensor area on the front or back side of the measuring tool.
-
Page 11: Warranty
INSTRUMENTS INSTRUMENTS WARRANTY This product is warranted by the manufacturer to the original purchaser to be free from defects in material and workman- ship under normal use for a period of two (2) years from the date of purchase. During the warranty period, and upon proof of purchase, the product will be repaired or replaced (with the same or similar model at manufactures option), without charge for either parts of labour.
-
Page 12: Appendix 1. Warranty Card
WARRANTY CARD Name and model of the product ________________________________________________ Serial number ________________date of sale_______________________ Name of commercial organization _____________________stamp of commercial organization Warranty period for the instrument explotation is 24 months after the date of original retail purchase. During this warranty period the owner of the product has the right for free repair of his instrument in case of manufacturing defects. Warranty is valid only with original warranty card, fully and clear filled (stamp or mark of thr seller is obligatory).
-
Page 13
WARRANTY DOESN’T EXTEND TO FOLLOWING CASES: 1. If the standard or serial product number will be changed, erased, removed or wil be unreadable. 2. Periodic maintenance, repair or changing parts as a result of their normal runout. 3. All adaptations and modifications with the purpose of improvement and expansion of normal sphere of product application, men- tioned in the service instruction, without tentative written agreement of the expert provider. -
Page 15
INSTRUMENTS Руководство по эксплуатации Детектор проводки, металла, дерева Модель: Wall Scanner120 Prof Производитель: ADAINSTRUMENTS Адрес: WWW.ADAINSTRUMENTS.COM… -
Page 16
WallScanner 120 Prof INSTRUMENTS Оглавление 1. Применение ……….. . 17 2. -
Page 17: Применение
WallScanner 120 Prof INSTRUMENTS Применение Настоящий измерительный инструмент предназначен для поиска в стенах, потолках и полах металлов (черных и цветных металлов, например, арматурной стали), деревянных балок, а также электрокабелей под напряжением. Свойства 1. Светодиодная сигнализация 2. Ориентировочная линия для маркировки 3.
-
Page 18
WallScanner 120 Prof INSTRUMENTS 12. Сенсорная зона 13. Датчик приближения к поверхности 14. Батарейный отсек 15. Отверстия для ремешка ЭЛЕМЕНТЫ ИНДИКАЦИИ a) Индикатор отключения звукового сигнала b) Индикатор предупреждения с) Индикатор режима работы — не металлические объекты d) Индикатор режима работы — не магнитные металлические… -
Page 19: Технические Данные
WallScanner 120 Prof INSTRUMENTS Технические данные Глубина обнаружения, макс.*: черные металлы 120 мм цветные металлы (медная труба) 80 мм кабели (под напряжением)** 50 мм древесина 38 мм Автоматическое выключение прибл. через 5 мин Рабочая температура -10 °C…+50°C Температура хранения -20°C…+70°C Батарея…
-
Page 20: Работа С Инструментом
WallScanner 120 Prof INSTRUMENTS Работа с инструментом УСТАНОВКА/СМЕНА БАТАРЕИ Используйте только батарею 9В. Вставьте батарею в батарейный отсек (13). Соблюдайте полярность. Если Вы продолжительное время не пользуйтесь измерительным инструментом, то батарея должна быть вынута из инструмента. При продолжительном хранении инструмента батарея может окислиться и разрядиться.
-
Page 21
WallScanner 120 Prof INSTRUMENTS Когда детектор находится на поверности объекта, светодиодная сигнализация (1) загорается зеленым светом. Индикация i на дисплее показывает максимальную амплитуду над центром объекта. Светодиодная сигнализация (1) загорается красным светом и раздается звуковой сигнал. Если объект маленький и находится на большой глубине, светодиодная… -
Page 22: Обнаружение Объектов
WallScanner 120 Prof INSTRUMENTS ОБНАРУЖЕНИЕ ОБЪЕКТОВ Обнаружение металлических объектов Для обнаружения металлических объектов нажмите клавишу 9. Над кнопкой загорится индикатор зеленого света. На дисплее отобразится значок (металл) или Важно: шкала i будет полной при обнаружении арматурной стальной сетки или стального предмета. Кольцо подсветки…
-
Page 23
WallScanner 120 Prof INSTRUMENTS Нажмите на кнопку 10. Кольцо подсветки и индикатор над кнопкой загорятся зеленым светом. При обнаружении металлических объектов, гвоздей, винтов, детектор может принять деревянную балку за металлический предмет. В этом случае поместите детектор на другое место исследуемого объекта и начните измерение заново. В… -
Page 24: Указания По Применению
WallScanner 120 Prof INSTRUMENTS Указания по применению В силу принципа работы измерительного инструмента некоторые условия окружающей среды могут влиять на результаты измерения. Сюда относится, например, близость приборов, излучающих сильные магнитные или электромагнитные поля, влага, строительные материалы с содержанием металла, изоляционные материалы, кашированные алюминием, токопроводящие…
-
Page 25: Освобождение От Ответственности
INSTRUMENTS INSTRUMENTS Освобождение от ответственности Пользователю данного продукта необходимо следовать инструкциям, которые приведены в руководстве по эксплуатации. Даже, несмотря на то, что все приборы проверены производителем, пользователь должен проверять точность прибора и его работу. Производитель или его представители не несут ответственности за прямые или косвенные убытки, упущенную выгоду или…
-
Page 26
ГАРАНТИЙНЫЕ ОБЯЗАТЕЛЬСТВА НЕ РАСПРОСТРАНЯЮТСЯ НА СЛЕДУЮЩИЕ СЛУЧАИ: 1.Если будет изменен, стерт, удален или будет неразборчив типовой или серийный номер на изделии; 2.Периодическое обслуживание и ремонт или замену запчастей в связи с их нормальным износом; 3.Любые адаптации и изменения с целью усовершенствования и расширения обычной сферы применения изделия, указанной… -
Page 27
ГАРАНТИЙНЫЙ ТАЛОН Наименование изделия и модель ________________________________________________ Серийный номер ______________________Дата продажи_______________ Наименование торговой организации ___________________Штамп торговой организации мп. Гарантийный срок эксплуатации приборов составляет 24 месяца со дня продажи. В течении гарантийного срока владелец имеет право на бесплатный ремонт изделия по неисправностям, являющим- ся…
![]()
INSTRUMENTS
Operating manual
Wire, metal and wood detector
Model: Wall Scanner 120 Prof
|
Manufacturer: ADAINSTRUMENTS |
Address: WWW.ADAINSTRUMENTS.COM |

WallScanner120 Prof
INSTRUMENTS
|
Table of contents |
||||
|
1. Intended Use . . . . . |
. . |
. . . . . . . . . . . . . . . . . . . . . . . . . . . . . . . . . . . . . . . . . . |
3 |
|
|
2. |
Product Features . . . . |
. . . |
. . . . . . . . . . . . . . . . . . . . . . . . . . . . . . . . . . . . . . . . . . . . . . |
3 |
|
3. |
Technical data . . . . . |
. . . |
. . . . . . . . . . . . . . . . . . . . . . . . . . . . . . . . . . . . . . . . . . . . . . |
. 5 |
|
4. |
Operation . . . . . . . . |
. . . |
. . . . . . . . . . . . . . . . . . . . . . . . . . . . . . . . . . . . . . . . . . . . . |
. 6 |
|
5. |
Detection of objects . . |
. . . |
. . . . . . . . . . . . . . . . . . . . . . . . . . . . . . . . . . . . . . . |
8 |
|
6. |
Operating Instructions . . |
. . |
. . . . . . . . . . . . . . . . . . . . . . . . . . . . . . . . . . . . . . . . . |
9 |
|
7. Maintenance and service . |
. . . |
. . . . . . . . . . . . . . . . . . . . . . . . . . . . . . . . . . . . . . . . . . . . . |
10 |
|
|
8. |
Warranty. . . . . . . . . |
. . . . . . . . . . . . . . . . . . . . . . . . . . . . . . . . . . . . . |
11 |
|
|
9. Exceptions from responsibility . |
. . . . . . . . . . . . . . . . . . . . . . . . . . . . . . . . . . . . . . . . . . . . . . . . . . . . . . |
11 |
Appendix 1. Warranty card

WallScanner120 Prof
INSTRUMENTS
Intended Use
The measuring tool is intended for the detection of metals (ferrous and non-ferrous metals, e.g., rebar), joists and ‘live’ wires/conductors in walls, ceilings and floors.
Product Features
1. Illuminated ring
2. Marking line
3. Display
4. Operating — mode indication
5. ON/OFF button
6. Illumination button
7.Sound On/Off button
8.Charged wire mode
9.Metal mode
10.Multi-functional wall detector
mode

WallScanner120 Prof
INSTRUMENTS
11.Contact pads
12.Sensor area
13.Type plate
14.Battery compartment lid
15.Hole for hand strip
|
DISPLAY ELEMENTS |
|
|
a) Switch Off audio signal |
|
|
b) Warning function |
|
|
c) Non-metal object |
|
|
d) Non-magnetic metal |
|
|
e) Magnetic metal |
|
|
f) Charged wire |
|
|
g) Temperature control |
|
|
h) Battery indication |
|
|
i) Measuring indicator |
|
|
j) Fine scale |
|
|
k) Indication “CENTER” |
|
|
4 |
MEASUREMENT FOUNDATION |

|
INSTRUMENTS |
WallScanner120 Prof |
|
Technical data |
|
|
Maximum scanning depth*: |
|
|
Ferrous metals |
120 mm |
|
Non-ferrous metals (Copper) |
80 mm |
|
Copper conductors (live)** |
50 mm |
|
Wood |
38 mm |
|
Automatic switch off after approx. |
5 min |
|
Operating temperature |
-10 °C…+50°C |
|
Storage temperature |
-20°C…+70°C |
|
Battery |
1×9 V |
|
Operating lifetime approx. |
5 h |
|
Weight |
270 g |
*Depends on material and size of objects as material and condition of structure. **Scanning depth will be smaller if wires/conductors are not “live”.
WallScanner120 Prof
INSTRUMENTS
Operation
INSERTING/REPLACING THE BATTERY
Use only 9Vbattery. Insert the battery into the battery compartment (13) in accordance with the symbols in the battery compartment. Remove the batteries if the unit will not be used for a long period. The battery can be corroded or discharged over long periods.
SWITCHING ON AND OFF
Protect the measuring tool against moisture and direct sun irradiation. Before switching the measuring tool on, make sure that the sensor area 12 is dry. If required, wipe the measuring tool dry using a cloth.
If the measuring tool was subject to an extreme temperature change, allow it to the adjust to the ambient temperature before switching on. Press ON/OFF button to switch on the instrument. After a short test the detector is ready for operation. The measuring tool automatically enter the function mode of metal detection.
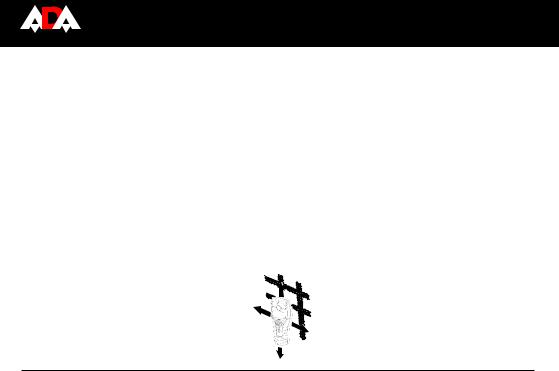
SCANNING
Put the tool on the surface of the object. Choose the correct operating mode and always move the tool in a straight line (as shown on the picture).

WallScanner120 Prof
INSTRUMENTS
When the tool is on the surface of the object, the illuminated ring lights up green.
Measuring indicator i indicates maximum amplitude above the center of the object. Illuminated ring (1) lights up red and audio signal sounds. For small and deeply embeded objects ring (1) can continue to light up yellow while there is no audio signal. To localize the object more precise, move the measuring toolo repeatedly (3x) back and forth.
WallScanner120 Prof
INSTRUMENTS
DETECTION OF OBJECTS
The detection of metal objects
Press button 9 to detect metal objects. Illuminated ring (1) and indication above the button (4) light up green. Symbol
|
(the metal detection indicator) or |
is indicated on the display. |
|
Note: Scale “i” will show all scale |
reinforcement steel mesh and steel in the examined base material. Illuminated ring lights |
up green.
Place the measuring tool onto the surface to be scanned and move it sidewards, when the measuring tool comes close to a metal object, the amplitude of the measuring indicator “j” increases. When it moves away from the object, the amplitude decreases, at the position of maximum amplitude, the metal object is located below the center of the sensor. Indicator k is displayed on the display.
Indicator “i” (detection depth value) is displayed on the display when scanning metal objects. The accuracy of depth value is a relation of shape and position of scanning metal objects. Symbol e/d shows whether metal is magnetic or not. Illuminated ring lights up yellow.
Note: If examined objects are small and deeply embedded, move the detector in horizontal and vertical direction. Pay attention to the indication “i” and “j” for accurate detection.
Multi-functional wall detector mode
Choose this mode for operation. The detector can indicate following items in the wall (except wooden beam):
—magnetic metal
—non-metal, e.g. beam, plastic pipes that are full of water.
—charged object, e.g. electric wire.
Press button 10. Illuminated ring and indicator above the button light up green. The detector can detect wooden beam as metallic object when scanning the metallic objects, nails, screws. In that case place the instrument on another place of the examined object and restart the measuring procedure.

WallScanner120 Prof
INSTRUMENTS
In rear cases the detector can’t detect examined object, because the sensor area and type plate are solid and dirty. Just clean the measuring tool with dry and soft cloth and restart the measuring procedure.
Scanning for “live” wires
This mode is suitable for detecting “live” conductors (110-230V). Press button 8 to activate Charged wire mode. Illuminated ring and indicator above button 8 light up green. When a live conductor is detected, indication f appears on the display. Move the detector above the measuring area several times to detect live wires. When the measuring tool is very close to the conductor, the illuminated ring flashes red and audio signal beeps swiftly.
Under certain condition (such as below metal surfaces or behind suefaces with high water content) “live” conductors cannot be securely detected.
Static electricity can lead to inaccurate indication of electric lines, e.g. over a large range. In that case place your free hand flat on the wall next to the measuring tool, in order to remove the static electricity.
Temperature control
The detector is equipped with a temperature control indicator . When the temperature control inducator lights up, the measuring tool is out of the operating temperature range or there are significant variations oin temperature. Switch the tool off and allow it to adjust to the ambient temperature before switching it on again.
Operating Instructions
In accordance with the principles of tool operation, the measuring values can be impaired through certain ambient conditions.These include, e.g. the proximity of other equipment that produce strong magnetic or electromagnetic fields,
 Loading…